Fruit desserts

Classic French lemon tart: After 15 years of tinkering with the recipe, this is the one we adore

By Leslie Brenner

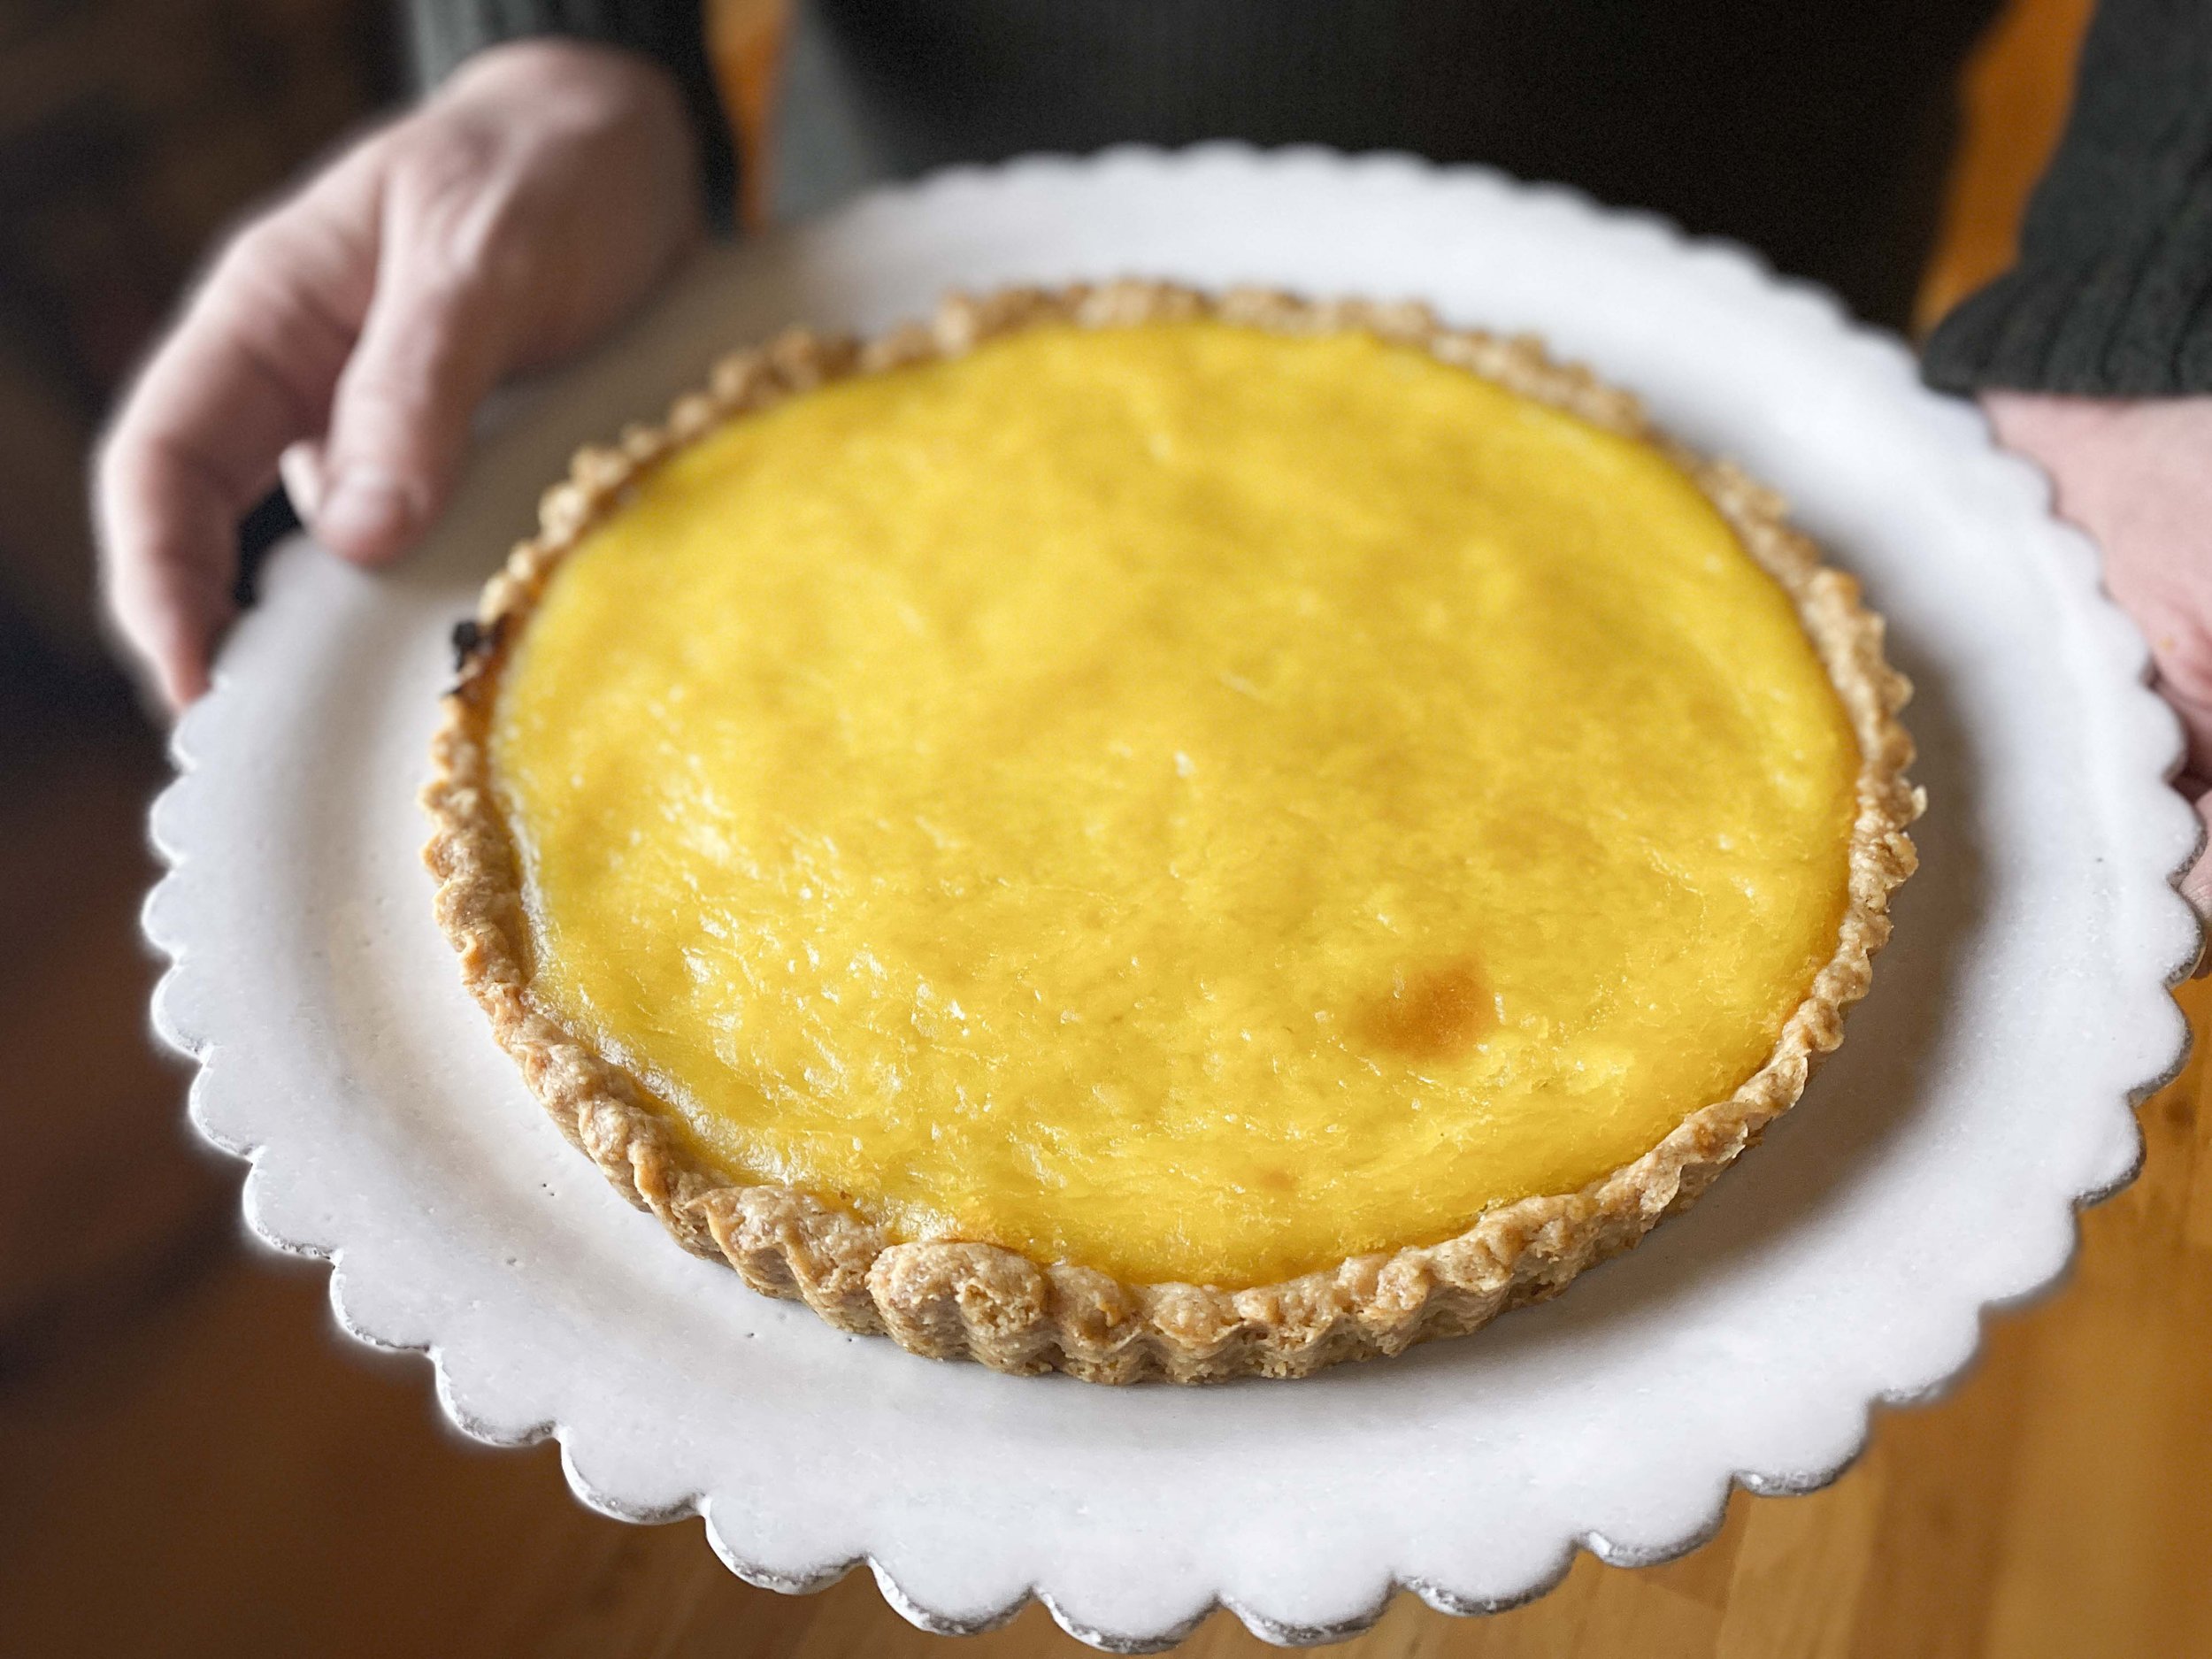
Among all the desserts in all the world, it’s hard to think of one more enduringly craveable and satisfying than a classic French lemon tart. At this moment before berries fully rev up (and as cherries and peaches quietly prepare to steal our hearts), a tarte au citron is a deliciously tangy way to celebrate spring.

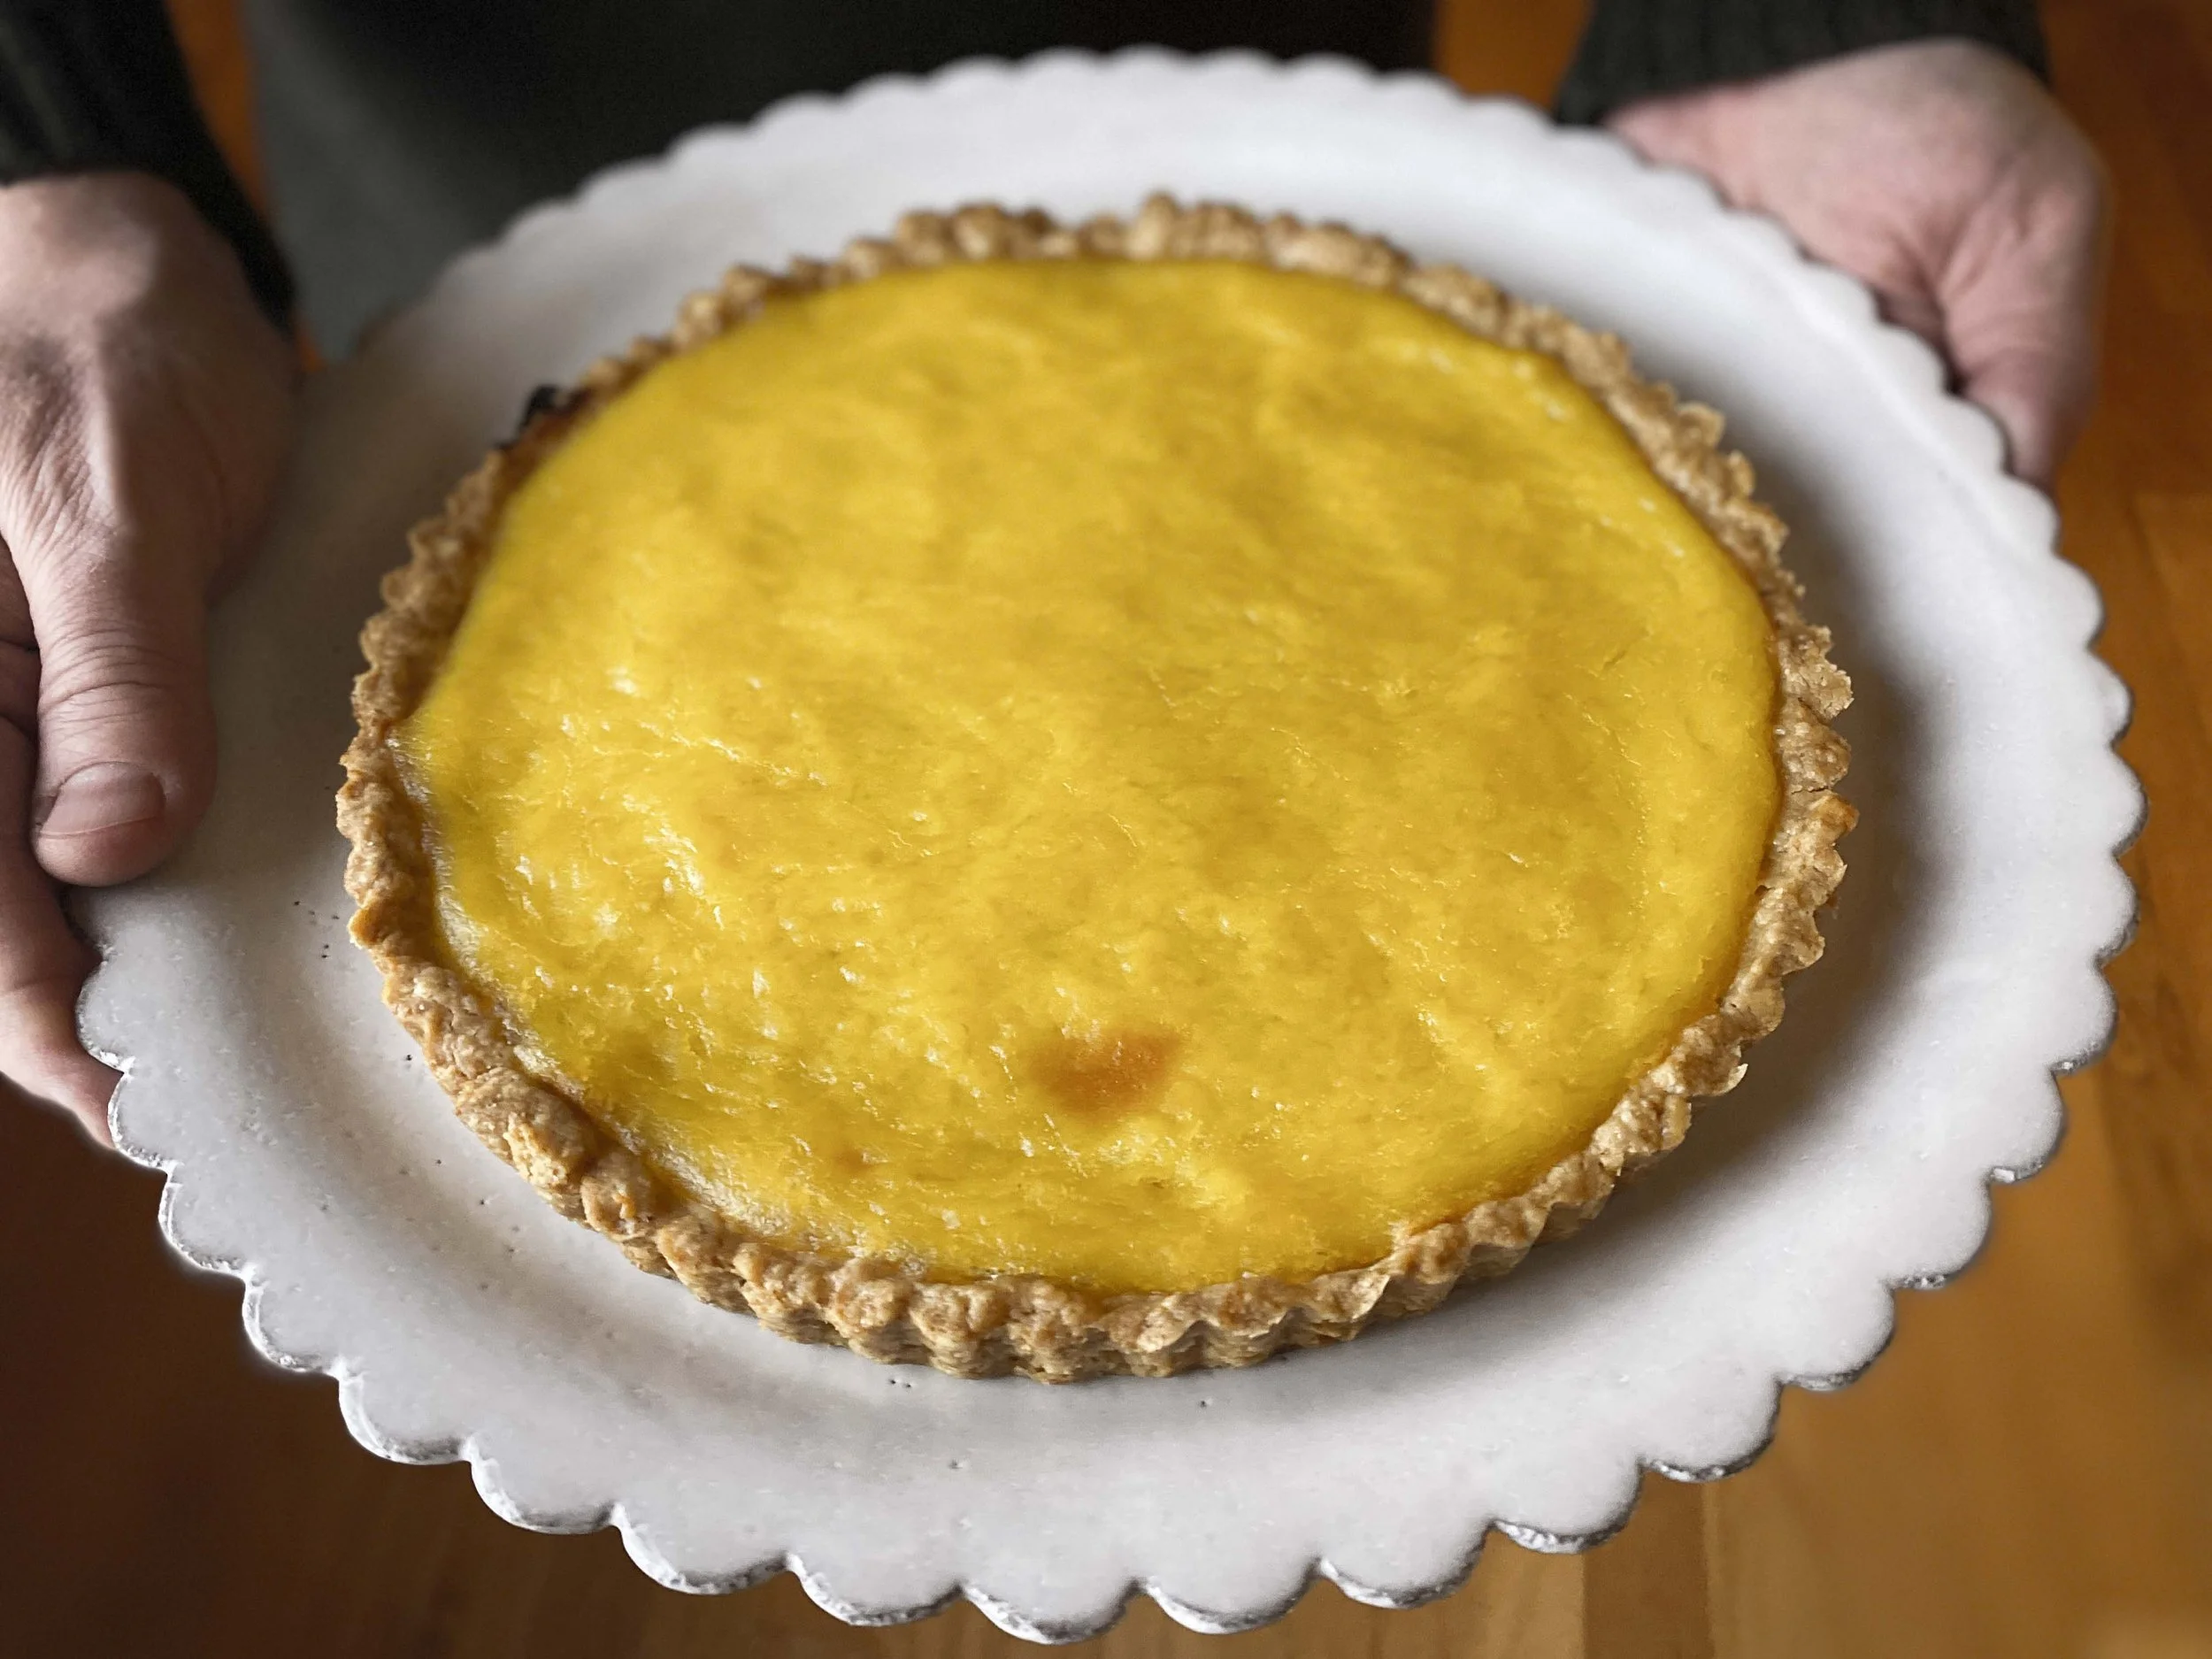
Sunny and optimistic, the iconic dessert is almost absurdly simple: just a pastry shell filled with lemon curd. Yet it’s so purely pleasurable it never goes out of style.

But what’s the best recipe? After many years of tinkering, I’ve distilled everything I’ve learned into one I think is just right. As with many things that are simple, it’s all about the quality of those components and how they talk to each other.

For the shell, some recipes use a short crust (pâte brisée) with a touch of sugar; others use a sweet pâte sablé, made with egg and lots of powdered sugar. Lemon curds are similar at their base — eggs, sugar, lemon juice and butter, cooked on top of the stove to creamy-custardy. But differences in approach, amounts of ingredients and technique can change the quality of the tart, sometimes dramatically.

The lemon tart’s power to cheer is remarkable. Back in 2008, when the global financial crisis hit, I baked one nearly every day for couple months to keep my spirits up, doing something slightly different each time. Since then, I’ve turned to it whenever I crave that gorgeous lemony blast, experimenting with different crusts, using more or less sugar, changing up the egg-approach, how much butter to use or when to incorporate it. Sometimes, I’d act like a lemon tart virgin and faithfully follow a recipe in a new cookbook, hungry to discover something fresh.

What I’ve learned over these many years is that despite the oft-cited dictum that baking is an exact science, a lemon tart gives you plenty of room for error, and inevitably plenty of joy. There’s more room for improvisation than you’d think. If you know the basics of how to make a crust, you can hardly go wrong, and lemon curd is not difficult or finicky.

I also learned that there’s a world of difference between a good lemon tart and a great lemon tart.

To me, the ideal is a very lemony one that’s not overly sweet, with depth of flavor, a velvety texture and a crust that’s brilliantly tender and buttery. And as a cook, I want a recipe that yields spectacular results every time with as little fuss as possible and in the shortest time.

A short crust pressed into a tart pan, before blind-baking

The question of crust

Choosing between pâte brisée and pâte sablé was easy for me; with a palate more savory than sweet, I’ve always been a short crust fan. Before my 2008 tart follies, I was accustomed to crusts that you form, chill and rest, roll out, fit into the pan, chill again, fill with weights, and bake. I think it was my friend Michalene who suggested I try the short crust in Chez Panisse Desserts by Lindsey Shere (the iconic restaurant’s original pastry chef).

Here’s something beautiful: It doesn’t require rolling. You start with butter that’s not too cold, work it into the flour with your fingers, gather it into a ball, let it chill, then use your fingers to press the dough into a tart pan with a removeable bottom. Chill that, then blind-bake it (no pie weights necessary) till it’s golden. Much shorter from start to finish, less messy, less scary.

It’s a beautiful crust that’s more tender than any other I’ve made. I’ve tweaked Shere’s original a bit over the years — yielding a bit more dough so it stretches more easily into a 9-inch pan, and decreasing resting/chilling time. It’s just as wonderful.

Conquering curd

As for the curd, there’s an aesthetic divide among lemon tart creators: Some fill the blind-baked crust with chilled curd and say voilà, while others fill the blind-baked crust then bake it again with the curd. The first way results in a filling that’s silky and creamy; the second is nicely set and firmer, more like velvet than silk. I prefer the texture of the baked filling, and feel that the time in the oven adds depth of flavor as well.

A lemon tart with an unbaked filling — smooth, silky and lovely, but not the vibe that rocks our boat

To make the curd, you can use whole eggs or a combination of whole eggs and yolks, for extra richness. Personally, I don’t need it to be extra-rich, so I use whole eggs without messing with separating them just for the yolks. (And that way I’m not left with unspoken-for egg whites.) When to add the butter is another question. You can drop it in directly after combining the eggs, sugar and lemon juice, and let it melt as you start cooking, or whisk in cold bits of butter after you’ve cooked the eggs, sugar and lemon juice.

And then there’s the matter of how sweet or tart to make it. Shere’s recipe for lemon curd filling, published in that same cookbook in 1985, calls for 6 tablespoons of sugar (roughly 1/3 cup) for a 9-inch tart. These days, many recipes call for double or triple that much sugar, or more. (A recipe for French Riviera Lemon Tart in Dorie Greenspan’s Baking with Dorie calls for 3/4 cup sugar; the Pioneer Woman’s Lemon Tart filling calls for 1 1/4 cup.) America’s sweet tooth wants more and more sugar.

Not me. I like my lemon tart more tart and my sugar consumption in check, so my recipe calls for 1/2 cup. If you’re worried that won’t be sweet enough, consider that my bookshelves are filled with classic old cookbooks calling for 1/2 cup sugar for their 9-inch classic tartes au citron: It’s sweet enough for history — and for my husband and his sweet-tooth.

On board for the sunny, tangy treat? Make one next weekend! It’ll be just the thing for an Easter brunch, a special dinner with friends, or a just-because-I-deserve it pick me up.

Our favorite lemon tart: press-in short crust, baked filling, not-too-sweet

Want free recipes delivered to your inbox? Sign up below!

Showstopper dessert encore: Make Ottolenghi's fabulous rolled Pavlova while we still have peaches!

EDITOR’S NOTE: This story was first published on July 30, 2021. Yotam Ottolenghi and Helen Goh’s rolled Pavlova continues to be one of our favorite desserts ever. Peaches should be available from somewhere in the United States for at least two or three more weeks, so now’s the time to thinking about making it.

By Leslie Brenner

Looking for something fabulous and sweet to make this weekend or next? Or maybe you want something to wow a crowd during your upcoming August vacation?

Look no further: This rolled Pavlova from Sweet: Desserts from London’s Ottolenghi is absolutely smashing. Dramatic and gorgeous, it makes a hell of an impression — but it actually requires surprisingly little effort.

If you’ve never had or made a Pavlova, it’s actually quite simple: just whip egg whites with sugar until they’re thick and glossy, add a little vanilla for flavor and a touch of vinegar and cornstarch to stabilize, spread it on a parchment lined sheet pan and bake. When it comes out of the oven, it’ll be super-light, crisp and crusty on the outside and marshmallowy-soft on the inside. Round ones make great bases you can use in place of the shortcake for strawberry shortcake, or you can make a big one, dollop on whipped cream, top it with fruit and nuts and make a gorgeous statement. We’ve been doing both of those for years. Pavlovas are particularly wonderful for anyone needing or wanting to eat gluten-free.

But we’d never heard of a rolled Pavlova until we were flipping through Sweet last weekend, looking for a fruit dessert that we hoped would wow some wonderful new friends we’d invited to dinner.

And wow, did it! Not only was it a show-stopper; it was actually a show — everyone wanted to watch the dramatic roll-it-up maneuver. Then cutting the slices (thick ones! delightful crackly noise!) was its own entertaining moment.

The recipe probably reads a little scary if you’ve never made a Pavlova before — rolling a flat, crisp, thick meringue could seem perilous — but I knew it would be soft enough inside that rolling it up should be no problem. More than a show-stopper; it was actually a show — everyone wanted to watch the dramatic roll-it-up maneuver. Then cutting the slices (thick ones! delightful crackly noise!) was its own entertaining moment.

The Pavlova was dreamy to eat: Lots of ripe and super-flavorful peak-season peaches and juicy blackberries mingling with whipped cream inside the soft and crunchy meringue roulade, with more whipped cream, fruit and toasted sliced almonds on top. Our friends had brought along a delightful Muscat de Beaumes-de-Venise — one of my all-time favorite dessert wines — a glorious match, thanks to the peaches.

OK, I know what you’re thinking: Need to run out and buy peaches, blackberries, cream and eggs. Do let us know how you love it.


This glorious plum-and-blackberry buckwheat tart is way easier than pie

Plum and Blackberry Buckwheat Tart

By Leslie Brenner

Lazy bakers, this one’s for you.

If you know anything about galettes, you know that the free-form pastries are super-forgiving, nearly foolproof. Hard to imagine, then, that the enticing tart shown in the photo above is actually (ahem!) a failed galette.

Here’s how it came to be. (I promise to make the story snappy and get right to the super-easy recipe.) On a recent trip to France, my husband Thierry and I lucked into a kilometers-long stretch of wild blackberry vines. After picking our way into purple-fingered, mûre sauvage happiness — with about a kilo of wild blackberries as our prize — I thought, time to bake a galette. I was looking for ease, didn’t want to make a pastry cream, and didn’t have a tart pan (or a rolling pin, or measuring tools, or a full-size oven) in Thierry’s mom’s kitchen.

I reached for Melissa Clark’s excellent New York Times master recipe for Fruit Galette. I had to make the galette oval, not round (to fit in the tiny oven!) but the wild blackberry galette was pretty damn wonderful! In fact, quick and easy as it was, it was one of the best tarts I’d ever made.

Wild blackberry galette

Wild blackberry galette

And so, when I returned home to Texas and wanted to make a lazy-person’s dessert featuring summer-into-fall blackberries and plums, I thought — naturally — of a galette.

Thing is, I’m crazy about whole grains and ancient grains, and love to incorporate them in baking projects whenever possible. Buckwheat, I thought, would be particularly nice with those deep early autumn fruit flavors, so half the flour would be buckwheat flour (and the rest all-purpose flour). I’d cut back the sugar and cornstarch — as I did with the wild berry galette — expecting success.

But when I tried rolling out the dough, it refused to hold together.

Aha!, I thought. Buckwheat does not have gluten, so the dough is not elastic enough to roll, even after resting an hour.

I pivoted, grabbed a 9-inch tart pan with a removable bottom, and pressed the dough into it: a perfect fit. Much easier than pie. (Anyone with fear of crust-rolling should be delighted!)

I chose not to blind-bake the crust, and didn’t give the dough time to rest after pressing it into the pan: This is truly a lazy baker’s tart. No need to peel any fruit, nor meticulously arrange carefully cut fruit into concentric circles. Just cut the plums in eighths (removing the pits), toss them with blackberries, sugar, cornstarch and a pinch of salt, dump the mixture into the crust, scatter sliced almonds on top (no need to toast first), and bake. It’s that simple.

And it was amazingly good. I’ll be baking this baby again and again. (Can’t wait, in fact!) The buckwheat flavor was right on; the crust was tender and flaky; the almonds were lovely with the the fruit, whose flavors concentrated gorgeously.

Want to try? Here’s the recipe.

Happy autumn!

Inspired by Diana Henry, this ridiculously easy autumn fruit-and-almond cake is a show-stopper

Autumn fruit and almond cake

This time of year, when late-season plums are offering one last chance, and black Mission figs beckon plumply, I love to throw them together with juicy blackberries and bake them onto an absurdly easy-to-make cake.

The Autumn Fruit and Almond Cake was inspired by a summer fruit and almond cake from the 2016 cookbook Simple: Effortless Food, Big Flavors by the British author Diana Henry.

Although it bakes for quite a long time (an hour and a half to an hour and 45 minutes), the actual work involved is minimal. For the fruit topping, slice figs in half, slice two plums, toss with berries and a little sugar. For the cake, dump all the ingredients in a food processor and blitz them. Pour and spread the batter in a parchment-lined springform pan. Arrange the fruit on top. Bake, cool, remove pan ring, sprinkle with powdered sugar.

Not overly sweet, it’s a spectacular treat for lovers of fruit desserts. Almonds in the form of marzipan adds a wonderful toothsome texture, and the almondy flavor marries beautifully with the figs and other fruit. Sour cream keeps it super-moist.

RECIPE: Autumn Fruit and Almond Cake

Effortless summer baking: The (life-changing!) joy of frozen puff pastry

How much fun can a (relative sane) person have with a box of frozen puff pastry? Quite a lot, as it turns out.

I spent most of my adult life avoiding puff pastry. Well, I'm always happy to eat it, but make it? Not so much. I made it from scratch exactly once, a hundred years ago; that was enough. I'm not the type of person to spend endless hours rolling out layers of dough and butter and chilling it and waiting and rolling, etc. etc.

Until very recently, it never occurred to me that there were good brands of pre-made frozen puff pastry made with actual butter rather than hydrogenated vegetable oils. 

I know, right?! How out of it can a person get?!

Some months ago, I happened upon a box of frozen puff pastry in the freezer case at Trader Joe's that boasted an all-butter situation, snapped it up, stuck it in my freezer and nearly forgot about it. Then, when I was visiting friends in London last month, my dear friend Jenni’s wonderful sister Alison invited us for dinner. It one of these off-the-cuff affairs for 20 or so. What I love about the way these girls entertain is that they don't stress (even when 20 people are coming!); they don't worry if everything's not ready when people start arriving. Sometimes Jenni doesn't even start cooking until people start walking in the door! She and Alison understand that the important thing is to hang out with friends and family, and whatever winds up on the table will be delicious just because. 

They also happen to have some very good ideas up their sleeves. On this particular evening – a regular weekly Friday night dinner with extended family and friends – Alison pulled a savory tart out of the oven, placed it on a table out in the garden, and wheeled a pizza cutter through it to slice it into hors d'oeuvre bites. 

This is Alison's savory appetizer tart, before it was sliced into pieces. Doesn't it look *fantastic*? It was!

This is Alison's savory appetizer tart, before it was sliced into pieces. Doesn't it look *fantastic*? It was!

The thing looked so delicious, I was mesmerized. Free-form, golden-crusted, beautifully messy, it was strewn with greens and mushrooms and slices of some kind of marvelous-looking washed-rind cheese melted into it. It was even more delicious than it looked – some kind of serious umami savory action on that perfect, flaky crust. I stayed there, parked next to it, trying with all my might not to eat piece after piece until it was demolished.

After showering her with compliments, I asked how she made it. "Frozen puff pastry!" she said. "All butter."

That was then (about a month ago). Now, four savory tarts, three fruit tarts and a set of cheese straws later, I can't imagine life without a box of the stuff in my freezer. At. All. Times.

All-butter frozen puff pastry, where have you been all my life?

All-butter frozen puff pastry, where have you been all my life?

So far, I have found three brands. Perhaps there are more out there. Both the Trader Joe's and the Dufour Pastry Kitchens' brands are far superior to the Pepperidge Farms non-butter frozen puff pastry I used to use occasionally in the past (that's the one with the hydrogenated vegetable oil; it also includes high-fructose corn syrup). The Dufour Pastry Kitchens classic puff pastry contains only butter, unbleached unbromated flour, water, salt and lemon juice. It's not inexpensive: I paid $10.99 for a 14-ounce box at my local Whole Foods Market and $10.49 for a box at my local Central Market. The Trader Joe's pastry was nearly as flaky and delicious, and much less expensive: $3.99 for an 18-ounce box. The Dufour brand is one single large rectangle, which comes folded; the Trader Joe's brand is two rectangular pieces, wrapped separately, which is nice (you can defrost one at a time); they come rolled.

Just one problem with the Trader Joe's brand: According to a clerk at my local store, the chain only sells it during the last quarter of the year, presumably for fall and holiday baking. So unless you keep a box in your freezer for more than six months, you can forget about it for summer baking. (Mr. Joe, please change your policy! If you do, I'll make you a summer tart!)

Mr. Trader Joe, if you start stocking your frozen all-butter puff pastry year-round, I will make you one of these. I promise.

Mr. Trader Joe, if you start stocking your frozen all-butter puff pastry year-round, I will make you one of these. I promise.

A third brand, White Toque, was $12.99 for a one-pound box at Whole Foods, but this brand is two rounds – which struck me as less wonderful for a savory tart to cut in small rectangles to eat as pre-dinner nibbles, but very nice for a fruit tart. The White Toque brand – which I've only spotted once – did not rise as high as either the Dufour or Trader Joe's brand, but it's possible it was because my refrigerator died, and after defrosting it sat in a less-than-optimal temperature for more than a few hours. I will give it another try next time I find it. Still, it worked just fine for a cherry-plum tart that I will blog about soon.

First I need to tell you the two ways all-butter frozen puff pastry has changed my life (and no, I'm not exaggerating). 

The first is the savory tart. I managed to approximate Alison's, although Alison used a really nice aged washed-rind goat cheese on hers, and I haven't been able to find anything like it 'round these parts.

But the great news is once you grasp how to put one of these tarts together, you can make one out of just about any kind of summer veg. The general idea is this: Thaw the pastry, unwrap it, and fold up the edges to make a rim, painting a little egg wash on them if you want glossy look. Make a filling of sautéed veg, add a couple of eggs beaten with a little cream or half and half, and either put some grated or crumbled cheese in the egg (feta, goat cheese, cheddar, etc.) or strew crumbled feta or goat cheese on top. Pop it in the oven. So easy.


You can riff on it endlessly, changing up the cheese or the sautéed veg, adding sliced fresh or chopped sun-dried tomatoes. It always turns out great, even if you're in such a hurry that you make a terrible mess of it – as I did with a zucchini, tomato and okra version in which I used too much egg and had a sloppy a edge, so egg spilled out all over the parchment.

My hastily-assembled zucchini, tomato and okra tart. With too much egg and sloppy edges, it spilled all over the parchment.

My hastily-assembled zucchini, tomato and okra tart. With too much egg and sloppy edges, it spilled all over the parchment.

It was still pretty fabulous. (For that one I sliced the okra in half vertically and grilled them before laying them atop the tart, along with sliced fresh tomatoes, before popping it in  the oven.)

Even so, it looked – and tasted – pretty great!

Even so, it looked – and tasted – pretty great!

The point is, these savories are so easy and impressive that they have already become a go-to appetizer for me for laid-back summer entertaining. A glass of rosé, a slice of savory tart – who needs anything else?

OK, here's the other way in which all-butter frozen puff pastry changed my life: They are brilliant to use for summer fruit tarts, including those that star unbaked fruit, like berries.  

Until I learned the joys of frozen all-butter puff pastry, I couldn't for the life of me figure out how to make a good tart using fresh strawberries. All you do is make a quick pastry cream – which is way less involved than you might think (much less tricky than making most custards), blind-bake a crust, spread the pastry cream on top, and cover with berries. If you want to be fancy you can melt some fruit jelly and glaze the berries, but you don't have to. 

I also made a pretty wonderful tart using mixed berries – blackberries, blueberries and raspberries. That one is super easy because you don't have to stem or slice or pit anything -- just toss the berries with a little orange liqueur before dropping them onto the pastry cream. 

Easy berry tart. How festive would this be for the Fourth of July -- or Bastille Day?

Easy berry tart. How festive would this be for the Fourth of July -- or Bastille Day?


I'm thinking it could be the perfect, patriotic-hued dessert to serve on the Fourth. Or for Bastille Day! What the recipe? Here you go. 

Mini strawberry Pavlovas may be the most brilliant Passover dessert ever

If ever there was a dessert meant for Passover, it's this one: mini strawberry Pavlovas. 

So, what's a Pavlova, anyway?

It's an Australian dessert named for the Russian ballerina Anna Pavlova (so the story goes), following one of her tours through Australia. Traditionally it's a large, thick meringue disk – hard and crisp on the outside, soft and pillowy on the inside – topped with whipped cream and berries or other fruit. Made this way, it's sliced into wedges to serve. 

Sized individually, mini Pavlovas are just as impressive, not to mention great for entertaining as they're so easy to make and serve. 

Why are mini Pavlovas so brilliant for Passover?

Let me count the ways:

1. There's no flour, making the dessert welcome at the Passover table.

2. They star strawberries, just as the fruit comes into the full flush of its season. 

3. They're beautiful and impressive-looking, yet easy and fool-proof to make.

4. You can make their meringue bases ahead of time – even the day before – and cut and macerate the berries in advance. All that's left to do last-minute is whip cream and assemble the Pavlovas, which is no harder than assembling strawberry shortcake. They're easy enough to manage during the craziness of a seder. 

Pavlovas aren't just for Passover

Pavlovas are having a moment in restaurants – at least here in Dallas, where one of the city's top pastry chefs, Keith Cedotal, is turning out beautiful individually sized versions, filled with citrus mousse and mixed berries, at fashionable Mirador restaurant. 

Besides being chic and delicious, Pavlovas also happen to be gluten-free – just the thing for gluten-intolerant berry lovers who are accustomed to passing up the strawberry shortcake. 

When I say Pavlovas are easy to make, I'm not kidding. All you do is whip up some egg whites, beat in sugar and, if you like, a touch of lemon or orange liqueur. If you want to get fancy, add some lemon zest. Spoon them into messy circles on a parchment-lined baking sheet and bake for less than an hour, till they're light golden and hard to the touch. 

Layer them with whipped cream and strawberries (macerated in a touch of lemon liqueur or orange liqueur if you like), and there you are. If they're messy, or the meringues break that's OK – disheveled is part of their charm. 

Brilliant, right? Here's the recipe:


Gorgeous, fabulous and ridiculously easy to make: This autumn fruit and almond cake has it all

For years I'd been meaning to cook from one of British author Diana Henry's beautiful cookbooks, like the one she won a James Beard Award for last year, A Bird in the Hand. And so when a review copy of her new book Simple: Effortless Food, Big Flavors landed in my inbox, I seized the moment. So many of the recipes look wonderful: toast with crab and cilantro-chile mayo; Indian sweet potatoes with chickpeas and coconut; roast lamb loin fillets with a minty-almondy Sicilian sauce called zhoggiu; roast eggplants with tomatoes and saffron cream.

I know, right?

But it was a sweet from her chapter on fruit desserts that I couldn't resist making right away last month – a summer fruit and almond cake. Here's what's amazing about it: You throw all the cake ingredients into the food processor, whirr them up, pour them in the pan (an 8-inch springform pan), top them with fruit (arranged "higgledy-piddledy" – how great is that?!) and pop it in the oven. Can you imagine anything easier? The recipe calls for ripe nectarines, unripe plums and raspberries; I used blackberries instead.

Summer fruit arranged "higgledy-piddledy" on top of the batter

It turned out great! Super-moist, with a nice crumb, lightly (but not overpoweringly) almondy, with just the right balance of fruit to cake. The fruit became lushly flavorful with that nice long stay in the oven. 

I would have happily made it every week or two, except for one thing: Summer ended.

Since we are now into early autumn, I thought the same almond cake featuring shoulder-season fruit – figs, plums and blackberries – could be fabulous, and Henry mentions in her headnote that you can swap out other fruit. I jumped on the occasion to feature some gorgeous ripe Mission figs I found in the supermarket, along with late-season plums and plump blackberries.

I gathered the ingredients: the usual flour, butter, eggs, sugar, baking powder, salt and vanilla, plus sour cream, almond extract, crumbled marzipan. Henry's recipe called for superfine sugar, which I can never find in the supermarket, so I tried regular sugar, which worked just fine. The fruit gets tossed in sugar too; I used less than Henry suggests, as ripe figs are sweeter than nectarines. 

I popped it in the oven and baked it, for a very long time – her recipe calls for an hour and a half, but mine took longer both times. Start testing it after an hour and a half; you know it's done when a wooden skewer inserted in the center comes out pretty clean (the fruit will mess it up a little; you just don't want raw cake batter on the skewer). Let it cool in the pan, then remove the ring and dust it with powdered sugar. (Pro tip: Put a spoonful of powdered sugar in a fine-mesh strainer, and use the spoon to tap the strainer on the side over the cake for a soft, even dusting.)

Ready to give it a spin? Here's the recipe:

And hey – I'd love to hear what you think if you try it! Or even if you don't – does it look good? Awful? Might you bake it in the future? What do you think??? We could have so much fun if y'all would leave comments!

Summer's most glorious make-ahead dessert: Cardamom-scented milk custard with apricot gel and crushed pistachio

My friend Greg Stinson is one of the best cooks I know. Part of it is his impeccable taste. He also has a finely tuned instinct for what flavors will shimmer brightest right now, this second, this season. And he knows what flavors will sing together.

And so when he was shopping for a dinner whose dessert would be cool, soft cups of cardamom-scented milk custard (that much he knew) and he happened on some blushingly beautiful ripe apricots, Greg's instinct kicked in and he took the custard idea from good to great. He'd capture that wonderful fresh apricot flavor in a gel on top of the custard, one that would be soft enough to ooze saucily into the cool, lightly sweet, exotically perfumed pudding. He divined just the right garnish, too: crushed toasted pistachios. 

How lucky am I to have Greg as a friend? Lucky indeed! That dessert was the captivating finish to dinner at the home of Greg and his husband Tim Simmonds a couple weeks ago.  It began with flatbreads (handmade by Greg) topped with juicy slices of sun-warmed tomatoes from Tim's garden. Next came beautifully spiced chicken kebabs, saffron rice (with a nice bit of crunchy tadig on the bottom!) and a lovely salad of chick peas, okra, tomatoes, eggplant and onion. It was all wonderful. 

And then those custards: so cool, lightly sweet, creamy and rich (but not too), just amazing with the vibrant apricot saucy gel that tasted like a sun-drenched orchard. On top of it, they were gorgeous in their green glasses on Greg and Tim's table.

I know what you're thinking. Yes, if you're lucky you can still find apricots in the market. The dessert, which channels the flavors of Turkey or Tunisia with its cardamom scent, pistachio crunch and apricot exclamation point, is ideal for making head – perfect for a laid-back late summer dinner party. 

It took Greg a couple of tries to nail the dessert, and not surprisingly he didn't measure things or write down what he did. "But Greg!" I protested, "this could be a smashing Cooks Without Borders dessert!" He walked me through what he did and the approximate amounts he used. I took a couple stabs at home and the recipe is now ready for you:

The custard – and eggless one – is easy to make, and sets up quickly in the fridge. Pour it into pretty heat-proof cups or ramekins. Then quarter the apricots – no need to peel them – and cook them down with a little sugar and fizzy prosecco till they're soft and translucent. A spin in the food processor and a trip through a fine sieve and you've got your gel to pour over the custards. Let them chill till after dinner, then top them with toasted crushed pistachios and serve. 

What can we say but three cheers for Greg?! 


Summer dessert slam-dunk: Make this dazzling (and fool-proof!) stone-fruit tart

After many a summer afternoon spent pitting peaches, slicing fruit, testing crusts and going back to the drawing board, I've finally got it: a stone fruit tart that's more than just beautiful. This one has that elusive quality we're all about at Cooks Without Borders: It's crazy good.

There are definitely crusts that are quicker to put together, but this one – my go-to short crust, adapted from Lindsey Shere's Chez Panisse Desserts – is preternaturally tender and buttery. Seriously, you won't believe how great it is. Though it takes some time (you'll want to start it in the morning, or the day before), there's not a lot of work involved, it's all about resting and chilling the dough. Best of all, it's easy and fool-proof: no rolling involved; you just press it into the tart pan.

Here's how easy it is: Combine flour, salt, lemon zest and a touch of sugar. Add butter, cut into pieces, and work the butter in with your fingers till it looks like this. Sprinkle on a tablespoon of water mixed with half a teaspoon of vanilla, work that in, gather it in a ball, wrap it in plastic, and chill it half an hour.

Now flatten the ball, set it in the tart pan, and use your fingers and palms to flatten it completely and press it into the corners. Keeping flattening and pressing, moving the dough around with your palms and fingers, until it evenly covers the pan. If it seems like it won't work, or it's not enough dough, or whatever, don't worry – it will work. When you're done it will look like this. Poke some holes it with a fork (that's called "docking" the crust, so bubbles don't form under it as it bakes), cover it with foil and stick it in the freezer half an hour or overnight. 

Bake it in a 375 degree oven till it's golden brown. Let it cool slightly, and you're ready to fill it.

Now the real fun begins. Spoon some preserves on the bottom of the crust: peach, apricot or plum, according to your taste and the stone fruit you're using, and spread it around. Gather your stone fruit: I used nectarines, black plums and apricots for this one. Peaches are great too, of course. If you can't decide between peaches and nectarines, consider that nectarines don't have to be peeled (neither do plums or apricots). Pit then and slice them into six or eight wedges each, depending on the size of the fruit. I used medium-small nectarines, and cut them each into six wedges; same for the apricots. 

Arrange the slices, starting with the outer edge of the tart, around the periphery, skin-side down, making them stand up against the edge of the crust as vertically as you can (which may be not very). 

Make another row, using a different fruit if you like (or the same one – whatever, it's your tart!). Use that second row to nudge the first row up vertically. I used nectarines on the outside row, then plums. Then do another inside that one: I used apricots. Then another, then fill in the middle, just standing them up any which way. 

Drizzle melted butter over the fruit, sprinkle it with sugar, then sprinkle it with thyme leaves, if you like. I love that, but if you don't like the idea of herbs on your fruit, you can just leave it off – or add a different kind of depth by cooking the butter before drizzling until it's browned and nutty-tasting. A note about the sugar: I only used a tablespoon, resulting in a tart with bright fruit flavor. It was just right for me, but I wondered if it was on the tart side for others. My friends and Thierry – who has a serious sweet tooth – said it was just right for them; they wouldn't want more sugar. If you like things on the sweeter side, use 1 1/2 or 2 tablespoons.

Into the oven it goes; half an hour later it comes out.

Pretty, ain't she? You can serve it a little warm, or completely cooled; it's great for entertaining, as you can make it in the morning, if you like, and let it sit all day. Serve it just like that, naked, or with a scoop of vanilla ice cream, or maybe a dollop of lightly sweetened crème fraîche.

Happy summer.


Say hello to a super easy (and crazy good!) berry and peach crisp

In case you haven't noticed, I love love love fruit desserts.

A few days ago I found myself in possession of a fridge drawer full of ripe peaches – placed in chilly purgatory against my better instincts. I get so excited during the season that I overbuy (how is it possible that I'm the only one in the house who snacks on them?), and in Texas almost-summer, they go from ripe to fuggedaboudit in no time flat. So into the fridge they went . . . and joined an embarrassment of blackberries and raspberries. 

Peaches . . . blackberries . . . raspberries . . . hey, wait a minute. Sounds like a crisp just waiting to happen! 

The simple topping on this one, inspired by one I've made a million times from Lindsey Shere's Chez Panisse Desserts, is something every fruit-dessert-lover should have in his or her repertoire. Nothing more than flour, brown and white sugar, salt and a pinch of cinnamon with some slightly softened butter worked in with your fingers and toasted almond slivers added at the end, it puts just the right not-too-sweet crunch on top of luscious fruit. Years ago something gave me the idea (David Lebovitz's blog maybe?) that you can double the amount of crisp and freeze half of it, so if a windfall of ripe peaches or nectarines comes your way, you can quickly achieve a repeat performance. Brilliant.

So, what to do with the fruit? Peel and pit the peaches (about two pounds) and slice 'em into a bowl. Rinse a few baskets of berries (blackberries, or a combo of blackberries and raspberries) and add them to the peaches. Sprinkle a tablespoon of flour and two tablespoons of sugar on the fruit, toss it gently, and turn it into a baking dish. Smooth out the top a little, then distribute the topping over all. Pop it in an 375 degree oven for about 35 minutes, et voilà. The juices, peach and berry wonderfulness mingled together – concentrated and syrupy – bubble up through the crust here and there as it bakes.

Sometimes I serve it warm with vanilla ice cream. Sometimes I whisk some crème fraîche into whipped cream and serve it with a dollop of that. This time I just made good old fashioned whipped cream (lightly sweetened, with a glug of vanilla) and plopped that on each slice.

It was so good, all that juicy fruit bursting with flavor topped by that miraculous layer of brown and buttery crispness, that we nearly wept. 

No one stopped at one piece.

Perhaps you'd like the recipe?


Messy, gorgeous and dramatic: The berry Pavlova is a spring-into-summer stunner

My friend Jenni has an incredible flair for entertaining. Talk about making things look effortless: You can arrive for a dinner invitation at Jenni's at 7, and she'll just be walking in after a day at the office, bags of groceries in tow. You think: Did I get the day wrong? 

You didn't. She just doesn't fret about doing everything (or anything!) in advance. It'll be 10 p.m. before we eat, you think. And then whooosh!!! – Jenni goes into action, chopping onions, tearing lettuce, tossing things in a pan. Here, you slice the zucchini; I'll do the garlic. Out on the counter goes a fat, oozy burrata, a slick of olive oil, some pesto and prosciutto, crusty bread. Wine corks pop. Flowers land in a vase. Everyone's nibbling, and sipping, and laughing. Somehow before you know it, you're at the table – and wowed by what's before you. A butterflied leg of lamb strewn with rosemary branches. A spectacular salad, grilled asparagus, roasted potatoes. How did she do this? (She shares her delicious secrets at her blog, Jenni's Table.) 

Jenni and her husband Philip are from South Africa; we met through our kids when we all lived in L.A. (Wylie and their son, Max, were playing on opposing baseball teams, and we moms got to talking in the bleachers.) Now they live in London, which is where her family's originally from. Every couple of years we have a reunion in Southwest France, where Jenni's mom has a house, not far from Thierry's family. There we cook out of the garden, bake the orchard into pies. Sisters show up, and their husbands. Everyone's happy in the kitchen. Joy camps out in the garden. We always eat outside.

One of those crazy marvelous evenings at Jenni and Philip's house in the hills of L.A., Jenni whipped up a gorgeous, dramatic dessert: a magnificent Pavlova piled with whipped cream, smothered in berries from the farmer's market and strewn with pistachios. She must have made the Pavlova shell – a giant cushion of French meringue – that morning. Or maybe she'd snuck home at lunchtime, who knows. 

Anyway, impressive as it looks – the thing makes a pretty incredible statement! – it's actually very easy to put together, more time (unattended in a slow oven) than effort. And once you know how to make a Pavlova shell – the base of it – you have the perfect vehicle on which to show off all kinds of summer fruit: ripe peaches, plums and nectaries; macerated apricots with toasted sliced almonds; peaches tossed with blackberries – even something like mango and roasted pineapple showered with grated toasted coconut. Curiously, the Pavlova isn't South African or British; it's Australian, named for the Russian ballerina Anna Pavlova, as the story goes, after one of her tours through Australia. (It may possibly have been invented in the U.S., however.) 

Egg whites and sugar whipped to stiff peaks

But let's get to the important part: how to make one. To create the shell, whip room-temp egg whites till they hold soft peaks, then gradually add sugar, and continue whipping till they hold stiff peaks; whip in vanilla. 

The Pavlova, ready to go into the oven

The Pavlova, ready to go into the oven

Spoon the meringue into a thick circle on a parchment-lined baking sheet, and make a slight depression in the center with a spoon (just so the edges are slightly higher than the center). Put it in a 350-degree oven and immediately turn down the temp to 300. Let it bake for an hour and a half, then open the oven door and let it cool like that. Nothing to it! It'll look all craggy and rough. 

The Pavlova shell: ready to dress up!

But those cracks and crags are just the thing for catching the whipped cream and berries and juices you'll pile on top. 

Jenni tossed berries in sugar and added a spoonful of Banyuls vinegar – very French (and hard to argue with). Lately I've tossed them in Grand Marnier. Whip up a pint of cream and mound it on top. Spoon on those juicy berries and scatter toasted chopped pistachios over them. Or leave out the nuts and fold some chopped fresh mint in the berries. Riffing is encouraged! The Pavlova itself is easy and forgiving, crisp on the outside, like a cloud inside. When you eat it, you swim through a whirl of textures and tastes, cool and creamy and pillowy-crunchy, all bright and sweet and juicy.

Ready for the recipe? Here you go . . .

It's a summer fruit game-changer, for sure.


Nothing says spring like strawberry-mezcal ice cream

I don't know what inspired this exactly. Except it's spring, so I'm jonesing for strawberries. And it's spring, so I'm jonesing for mezcal. A friend was coming to lunch last weekend, and I wanted to cook Mexican. But dessert . . . strawberry shortcake? Nah. A big ol' Pavlova smothered in strawberries and cream? Nah. Almond cake with strawberries? Nah. None of it felt right to follow the lamb barbacoa tacos I'd planned. 

But ice cream! Who makes strawberry ice cream, anyway? I would! 

I figured I'd roast my strawberries, as they weren't exactly peak-season Harry's Berries (the fabulous ones I'd buy at the farmers market if I happened to be in Santa Monica). Roasting the supermarket berries would concentrate their flavor a bit. For some reason, when I thought about roasting them, I thought of hitting them with a little mezcal. In the back of my mind, I was remembering a wonderful nieve de naranja (orange ice) con mezcal my friend Michalene and I had when we were in Mexico City in February, at a restaurant called Fonda Fina. "Aha" moment! I thought mezcal might work well with the brightness of the berries. 

And so it did! Making the custard base is always easier than it sounds; just take it slow. Best to do this the day before you want to serve it, so the ice cream can set up in the freezer overnight – or at least for a few hours. In any case, you want to have time to chill the custard before it goes into the ice cream maker.

Want to leave out the mezcal? Just substitute half a teaspoon of vanilla. Or a teaspoon of aged balsamic vinegar. I served the ice cream with a couple of (store-bought) almond crisps.

Want the recipe? Here you go . . . 

Ta-da! Presenting a custom-created, Cooks-Without-Borders reader-asked-for-it lemon-raspberry tart

So I'm pretty excited about this: A reader who signed up for the Cooks Without Borders newsletter mentioned that she's craving a lemon-raspberry tart and would love a recipe. Hmm, I thought. That does sound awesome! Especially this time of year. 

I didn't know how I would make one, but I decided to give it my best. I knew what crust I'd use: Lindsey Shere's amazing short crust pastry from the Chez Panisse Desserts cookbook. It's foolproof, easy to put together (even if it seems kind of crazy while you're doing it), doesn't require rolling pin skills (you press it in the pan with your fingers) and results in an incredibly tender and flaky crust. 

I thought it would be nice to marry a classic lemon tart – filled will lemon curd – with raspberries somehow. But simply garnishing a lemon curd tart with raw raspberries didn't sound great. I could create a raspberry tart with lemon pastry cream, but pastry cream is a pain in the neck; lemon curd is easier and more forgiving. 

I found inspiration in Shere's recipe for a simple raspberry tart. She has you brush a prebaked tart shell with melted, strained raspberry preserves, line the shell with rows of berries, bake it for only five minutes, and then glaze it. Why bake the berries only five minutes? "This brings out the perfume of the raspberries without softening and making them mushy," she writes. Bingo! I'd make a lemon-curd tart, pull it out of the oven five minutes early, add just a couple rows of berries (so as not to overwhelm the lemon flavor with too much berry flavor), bake it five minutes more, then glaze the berries.

It turned out great! Two pals and I nearly polished off the whole thing, in any case – after eating a giant dinner. My raspberries were sort of dull-tasting supermarket berries, but treating them this way heightened their flavor. 

Are you up for it? Here we go!


First we make the crust. Don't be afraid: It's easier than you may think, and every time you make one it gets easier and easier. (Believe me: I'm not much of a baker, and I can manage it!). It's such a great crust that if there's one thing you want to learn dessert-wise, this crust might well be it. It's that good. 

To make it, whisk flour, salt and sugar together in a bowl, add sliced chilled butter and work in the butter with your fingers or a pastry blender until it looks like this:

Add vanilla and water, gather it into a ball, let it rest 30 minutes, then use your fingers to press it into a tart pan. It may look at first like you won't have nearly enough dough to cover the pan, but you do – just keep pushing it around with your fingers until you have an even layer covering the bottom and sides.


Stick it in the freezer for a half an hour, then it's ready to bake: in a 375 degree oven for 25 minutes, or until it's golden-brown and baked through. Got it? Here's the recipe:

Now let's make the lemon curd. Again, this may sound scary, but it comes together really nicely – and it has beautiful, bright lemon flavor.

Basically you cook eggs, sugar, lemon juice, lemon zest, milk and butter – stirring constantly – over low to medium heat until the mixture thickens to the consistency of a thick cream. Let it rest five minutes, give it a quick whisk, then chill it. Once it has cooled down, pour it into the baked tart shell.

Bake it in a 375 degree oven for 25 minutes, pull it out (leaving the oven on), add a couple of rows of berries, and pop the tart back in the oven for 5 minutes longer. Remove it from the oven, melt some strained raspberry preserves, stir in a little kirsch, and glaze the berries. Tart accompli! Shall we do this? Here's the recipe. Please let us know in a comment if you plan to try it – and if you do, how it turns out!